Tech pages · Mods & Builds · Guitar Amps · Tubes · Electronics
Plexi Marshall Heresy: "The Grinder" Mod
A '68 Superlead that had been cut in half with an angle grinder, brought back as a four-stage lead amp — by deleting the cathode follower instead of adding gain stages.
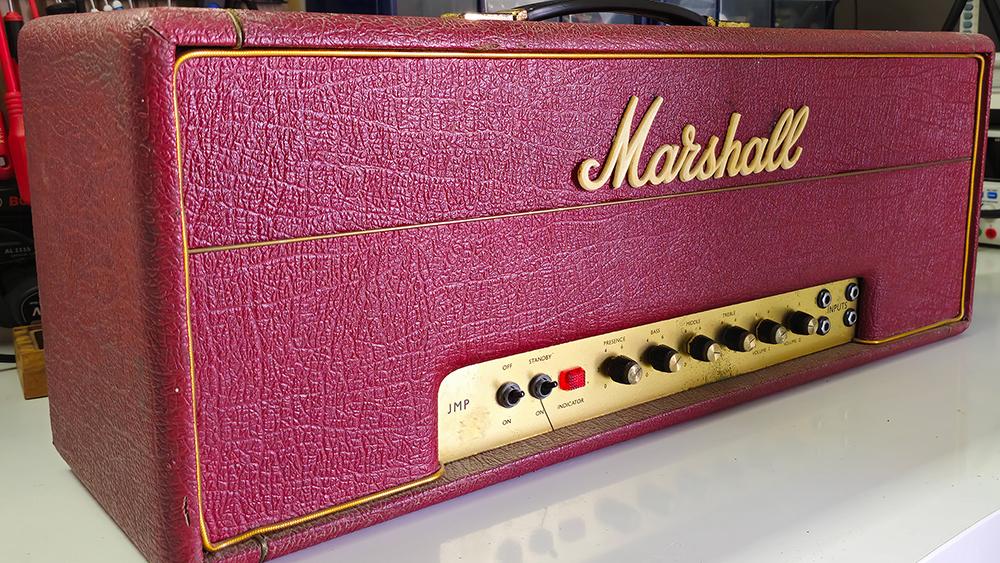
As we all know, the Internet of Things is full of various modifications you can apply to vintage Marshalls. The small problem I've noticed is that the same mods are recycled over and over again. It's genuinely hard to find a truly unique approach.
Now, generally speaking, a Marshall amplifier is not rocket science, and there is only a finite number of things you can do with the design. But there is one move that people rarely make, that changes the amp far more than another gain stage would, and that I think is more interesting than any of the usual recipes.
You delete the cathode follower.
The Short Version
- The mod replaces the Marshall cathode follower with a standard common-cathode gain stage, turning that half of V2 from a buffer into an amplifier. Four gain stages instead of three, and an unbuffered tone stack.
- That is a big tonal change, not a subtle one. The tone stack behaves completely differently when it is driven from a high impedance instead of a low one.
- The resulting circuit has a lot of gain, so it is held together by T-attenuators between stages. Leave them in. They are the reason it does not oscillate.
- Feedback: 47 kΩ from the 4 Ω tap, which — worked through below — reproduces almost exactly the stock Superlead's feedback ratio from a different tap.
- The amp in question had been cut in half with an angle grinder in the nineties to fit a rack. Hence the name.
The Amp
Some backstory first, because the mod has a lineage.
A couple of years ago I got an amplifier in for servicing from a guy who fronts a well-known band around here. He used to play a Mesa Boogie Rectifier, but at some point he came across a peculiar Marshall JCM800 2204 that had been modded somewhere in Germany.
It did not sound much like a traditional Marshall. It was absurdly fat and greasy, with exorbitant amounts of gain — far too much, honestly. You had to keep the Gain pot below halfway, because past 12 o'clock the amp became unstable. But keeping it low, it was a fiery ball packed with rock and roll.
I opened it up and found one of those designs where the cathode follower had been removed and that half of the 12AX7 repurposed as a standard common-cathode gain stage. Later I learned that Reinhold Bogner used this style of mod for some players in LA.
It did not take long to connect the dots — Bogner is German, this 2204 was modded in Germany. I suspect there was an old tech somewhere in Germany doing mods like this, and Bogner either adopted it or originated it. Does it matter? Not really. It is a logical modification to make to the circuit and a fantastic way to get more gain.

What the cathode follower is actually doing
Worth being precise about this, because "remove the cathode follower" sounds like removing something inessential and it absolutely is not.
A cathode follower has a voltage gain slightly less than one. It amplifies nothing. What it does is transform impedance: it presents a high impedance to the stage before it and a low impedance to the stage after it. In a Marshall, the stage after it is the tone stack.
That matters enormously, because a passive tone stack's behaviour depends on what is driving it. Fed from a low source impedance, the stack does what its component values say it should. Fed from a high impedance — a plate resistor of 100 kΩ, say — the source impedance becomes part of the network, and the controls interact differently, lose range, and the whole thing loads the preceding stage back. What a tone stack actually does covers the network itself in detail, if the mechanism here is new to you.
So swapping the follower for a gain stage does two things at once: you get a whole extra gain stage, and the tone stack changes character. My philosophy is that everything makes a difference, and the cathode follower makes a great deal of difference — to how the stack responds and, at least to me, to how the amp feels under the fingers.
I consider a buffered versus an unbuffered tone stack to be one of the important design choices in any amplifier. Some people like it, some don't. It is not better or worse. It is different.
What I Was Going For
The Grinder itself started with a friend of mine — a phenomenal player — inviting me for a drink and mentioning he had someone with him who wanted to talk about an old Marshall he wanted restored.
After a long conversation with the owner it became clear he did not just want it restored. He wanted more gain, in the direction of what Steve Lukather gets out of his Bogners as a core tone, with drive pedals in front.
Which was a nice coincidence, given where this mod came from.
The interesting thing is that the amplifier turned out to be a '68/'69 Plexi, which I did not know at the time. It had been recapped in the seventies, so I initially had it down as a '72. And at some point in the nineties somebody had cut the chassis in half with an angle grinder so it would fit a rack, using only the power amp as a slave. Quite crazy, right?

So the brief was: get the sounds he wanted without adding gain stages to a genuinely vintage circuit, and get the chassis back into one piece. Which is how I ended up here:

I do not have the power amp drawn out, because nothing was modded there — it is a typical late-sixties Marshall Super Lead power section, entirely stock.
This mod can be applied to pretty much anything from a sixties Plexi through to a JCM800. It will sound a bit different depending on the transformers, choke and power section, but it lands in the same ballpark.
Careful — Read This First
This is a vintage amp with 400 V-plus on the plates, and the filter capacitors hold that charge long after it is unplugged.
- Discharge the filter caps and verify with a meter before touching anything.
- Never run it without a load.
- Everything below assumes you are already comfortable inside a live amp. If you are not, this is not the amp to learn on — an original Plexi is not a practice piece.
And a separate warning that has nothing to do with electricity: this mod is not reversible in spirit, even though it is reversible in parts. You are changing what a vintage Marshall is. On a genuinely collectible amp, think hard first. The one in this article had already been cut in half with a grinder, which rather settled the question.
The Mods
For anyone who has modded a Marshall before, most of the schematic will be self-explanatory. Here is what actually matters.
The tone stack, unbuffered
The stack itself stays the classic Marshall arrangement. What changes is what feeds it: a standard common-cathode gain stage instead of the cathode follower. That is the mod, and it gives you a lot of gain along with a tone stack that behaves quite differently — see above for why.
The T-attenuators — do not skip these
You will notice a lot of attenuation in the schematic, in the form of T-attenuators between stages. I highly recommend leaving all of it exactly as drawn.
This circuit has a great deal of gain, and gain that is not managed becomes instability rather than sound. I am a firm believer in proper gain staging and in not overdriving the input of a stage that is not designed to take it. Each attenuator sets the level going into the next stage so it is being driven, not blasted.
To answer the question you are about to ask: yes, you can increase the gain by reducing the attenuation before stages 2, 3 and 4. I just don't recommend it. I designed this to have the healthiest possible amount of gain. If you need more, use a pedal — that is what the amp was built to accept.
Snubber caps on stages 2 and 3
Keep them. They give the amp a polished distortion character, and they keep it from oscillating. Those two things are related: a high-gain circuit with an unmanaged top end is a circuit looking for a reason to take off. The snubbers roll off what the amp does not need and remove the oscillation's fuel at the same time.
Gain pot treble bleed
The treble bleed cap on the gain pot can be swapped for a 4.7 nF if you want a different feel at lower gain settings. Honestly, I kept the gain maxed on this amp and went for heavy sounds, so I did not spend long there. It is a real option if you play it differently.
First-stage cathode resistor
The cathode resistor on the first stage can go to a higher value, which changes how the amp feels. I went with what is on the schematic because it gives a more compressed and smoother response, which is what the owner asked for. A lower value gives you a stiffer, more aggressive front end.
Negative feedback: 47 kΩ from the 4 Ω tap
I used a 47 kΩ feedback resistor connected to the 4 Ω tap on the output transformer, rather than the stock Superlead's 100 kΩ from the 16 Ω tap.
That looks like a much smaller resistor and therefore much more feedback, and it isn't — the tap change compensates. Here is the check.
Transformer secondary voltage scales with the square root of impedance, so for the same output power the 4 Ω tap sits at half the voltage of the 16 Ω tap. With the Marshall presence network's 5 kΩ shunt at the injection point, the feedback fraction works out as:
Effectively identical. The amp has the same amount of global feedback it left the factory with, arrived at from a different tap — which is exactly what I wanted, because the preamp was doing quite enough already without me also loosening the power amp.
The reason to take it from the 4 Ω tap rather than the 16 Ω one is practical: the amp was going to be used with a 4 Ω load, and taking feedback from the tap you are actually using keeps the feedback ratio correct rather than having it shift with the impedance selector.
Master volume, and the input arrangement
The Master Volume was added, since this started as a Super Lead and had none.
I also left all four Plexi inputs physically in place, but wired only two of them — and not in the way a 2204/2203 does it. The HI input parallels the two 68 kΩ grid resistors for an equivalent of 34 kΩ; the LO input goes through a single 68 kΩ.
The circuit is designed around the 68 kΩ grid stopper, so LO is the intended input. I left HI available in case the amp ever had to take a genuinely low-output signal. With all my guitars the HI input was simply too much — the amp got squealy and over-sensitive. That could have been fixed with another snubber cap, or with a better preamp tube, but honestly I just liked how it sounded through LO.
What I Deliberately Left Alone
The entire power section. It is stock late-sixties Super Lead and it stays that way — the transformers, the choke, the tubes, all of it. On an amp of this age, every original part still in the circuit is worth something, and the preamp changes were already carrying the whole brief.
The four-input front panel also stays, cosmetically intact. Two of the jacks do nothing. That is fine.

How It Turned Out
An old Plexi brought back to life, welded back together, modified, nicely packed — and I absolutely loved it.
It does exactly what the brief asked. It is fat and greasy with a great deal of gain, and it takes drive pedals the way the Bogner-flavoured sounds need it to. It is not a Plexi any more, and it is not pretending to be.
I do have an evil idea, since I liked this amp so much: I want to ask the owner to lend it back for a few days and record it properly. Maybe I'll make some profiles for those profiler toys people are gigging around with.


Try It Yourself
The single biggest thing this mod changes is what drives the tone stack, and that is exactly the kind of thing that is much easier to see than to argue about. Open Tone Stack Lab, load a Marshall stack, and compare it driven from a low source impedance against a high one. The controls stop being independent, the interaction between Bass and Treble changes, and the mid notch moves. That is the Grinder's whole personality in one picture.
For the feedback arithmetic in the section above — different taps, different resistors, and what it does to the response at the speaker — Feedback Lab does the whole loop properly, including what happens with a real cabinet on the end of it.
Sources
- The stock Marshall 1959 Super Lead feedback arrangement (100 kΩ from the 16 Ω tap into the 5 kΩ presence network) is from the factory schematic; the feedback-fraction comparison above assumes that shunt value.
- The 68 kΩ input grid resistors and the parallel HI / series LO arrangement are standard across the four-input Marshall circuits.
- The Grinder preamp schematic is my own drawing and is attached to this article as a PDF. The power section is unmodified late-'60s Super Lead.
- The Bogner connection is my inference from having worked on a German-modded 2204 with the same topology, not a documented attribution. I would be glad to be corrected by anybody who knows the actual origin.
Until next time, happy chugin'.