Tech pages · Mods & Builds · Power Supplies · Guitar Amps · Speakers & Cabs · Electronics
The Ultimate Hot Rod Deluxe Mod
The reliability fix every Hot Rod Deluxe needs, then a Dumble-flavoured mod set that turns the most-sold all-tube combo in the world into something you actually want to plug into.
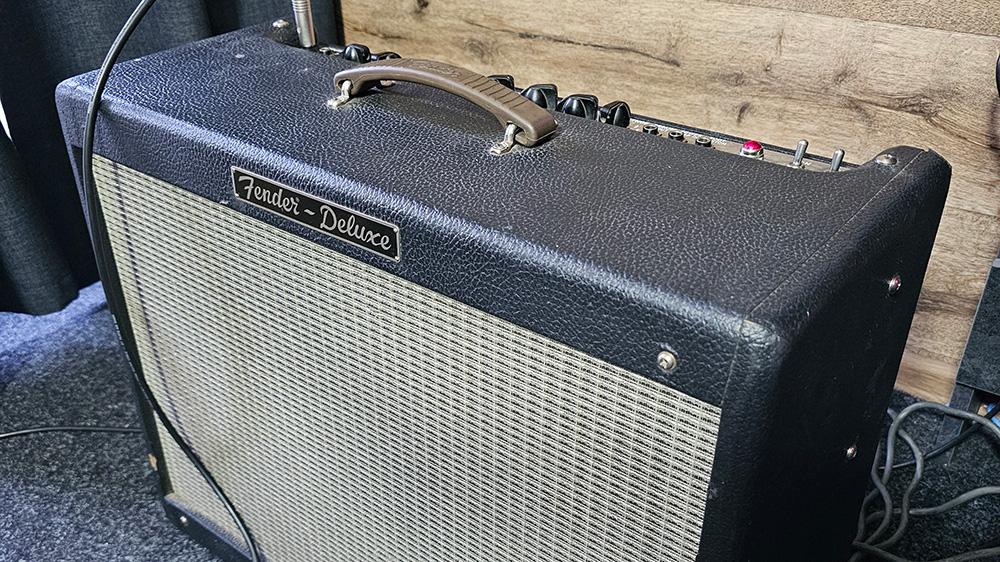
The Fender Hot Rod Deluxe is one hell of an amplifier. It can be extremely useful and pay for itself a thousand times over, and it can also bring you a world of trouble. Over the years I have had dozens through the shop, and honestly it is a fifty-fifty situation — half of them good and reliable, half riddled with problems.
As for the sound: I have never liked it. Some are slightly better than others, but let's be realistic. You are buying a three-channel amplifier with reverb and an effects loop, and two of the three channels are pretty much useless. You can guess which two. On top of that the reverb is not great and the effects loop on many models has dropout issues.
None of which stopped it being a brilliant business move. Judging by how many are out there, Fender sold a ridiculous number of them, and I thank them for it, because they have created a lot of work for amp techs.
But here is the thing: it can be improved. Significantly, and cheaply. Modded, I actually really like it. So fasten your seatbelts.
The Short Version
- Do the resistor mod before anything else, on any Hot Rod Deluxe you own. Large dropping resistors sit against a low-quality PCB and cook it, which is the root cause of the channel-switching faults and crackles these amps are famous for. This is a reliability fix, not a tone mod.
- The speaker is the biggest cheap tonal upgrade if you change nothing else. The stock amp is midrange-heavy and closed-in up top; pick a speaker that addresses that rather than one with a good reputation in the abstract.
- Power amp: a post-phase-inverter master volume in place of the Presence pot, and blackface Fender feedback values. Together they turn a hot-rodded combo into something with Fender manners.
- Preamp: most of the work is removing gain, not adding it. The drive channels are honky and over-compressed because they have too much of it in the wrong places.
The same approach works on the Blues Deluxe— correction: it doesn't, not directly. See Blues Deluxe Mods for why; that amp is a genuinely different circuit with its own factory bias trim.
The Amp
Forty watts, three 12AX7s, a pair of 6L6s, a single 12″ speaker, spring reverb, and a three-channel front end — Normal, Drive and More Drive — with a shared tone stack.
To Fender's credit, the newer versions are better built. They moved to a thicker PCB and adjusted the component layout, which genuinely helps with reliability. But like all overseas, affordable amplifiers, even the newer Hot Rod Deluxes still suffer from PCB issues, and the underlying design decision that causes them was never actually reversed.
Let's talk about the objective problems.
The gain channels are essentially useless. Honky, over-compressed, and there is nothing nice I can say about them.
The clean channel is functional but nowhere near the "super-amazing" sound some people claim.
The whole amp leans too heavily on the bass, to the point where it muddies the tones you actually want to hear.
And the power supply cooks the board. That one is not a taste question. See below.
What I Was Going For
The mod set here was originally a commission, and the client wanted the "Dumble" school of sound — so that is what I tailored it to. I mention this because it matters: I was not aiming for a Marshall-style drive channel, and if that is what you want, some of these choices are wrong for you.
The general strategy is the opposite of what people expect from a mod list. Most of the preamp work lowers gain. The Hot Rod's drive channels do not fail because they lack gain; they fail because they have too much of it, applied in places that produce compression and honk rather than sustain and clarity. Take gain out at the right points and the same circuit starts breathing.
I will flag which changes are crucial and which are optional, but I strongly encourage doing the whole thing. Each change has a ripple effect and several of them depend on the others to work harmoniously. In an amp like this it is also very difficult to change one channel without affecting the rest of the circuit — everything below touches all three channels, and all three end up better for it.
Careful — Read This First
Forty watts of 6L6 push-pull means B+ in the region of 400–450 V, and the filter capacitors hold it after the amp is unplugged.
- Discharge the filter caps and verify with a meter before you go anywhere near the board.
- Never power it up without a speaker or dummy load connected.
- This is a PCB amp, and the board is the weak point. Use a decent temperature-controlled iron and solder wick. Do not lever components out, do not park the iron on a pad, and do not do this work tired. Lifting a trace on a Hot Rod Deluxe turns a two-hour job into a long evening.
- The chassis-mount work in the first mod involves drilling the chassis. Get the transformer, the board and everything else out of the way first, and clear every filing out before it goes back together.
If any of that reads as unfamiliar rather than obvious, hand it to a tech.
The Mods
I have ordered these the way I would actually do them: reliability first, then the cheapest big tonal win, then the real work.
The resistor mod — do this one first
This should be done to every single one of these amplifiers as soon as you get it.
All Hot Rod Deluxes share a problem in the power section. Fender used large dropping resistors to derive the lower supply voltages the preamp needs, which is a perfectly cost-effective way to get there — and then mounted those resistors flat against a low-quality PCB.
Think about what a dropping resistor does. It gets rid of unwanted voltage by turning it into heat. A resistor dropping 100 V at 20 mA is dissipating 2 W, continuously, for as long as the amp is on. Mounted with no airflow and no clearance, that heat has nowhere to go but into the board underneath it.
Over time it cooks the PCB. The laminate discolours, the copper traces degrade, and you get exactly the faults these amps are known for: abrupt channel switching, crackling, and intermittent noise. People blame the relay or the footswitch. It is usually the board.
The resistors in question are R78 and R79 (Figure 3). There is a third, R97 (Figure 2), which is smaller but still gets hot enough to do damage.
Here is what I do, especially on amps whose boards are already damaged:
- R78 and R79: replace with larger wirewound resistors mounted directly on the chassis, then wire them back to their points on the board. The chassis is a big aluminium heatsink; the resistors run cool and the board never sees the heat.
- R97: chassis mounting is not necessary, but stand it off the board so there is air between the two.
To Fender's credit they addressed this somewhat in the last decade or so, with a better PCB and a bit more distance between the resistors and the board. It is duct tape rather than a fix — the resistors are still there, still dissipating, still close.


I strongly encourage doing this. It is a relatively simple job that saves you from major headaches and means you never meet these faults during a gig.
The speaker

If you are an average Hot Rod user, generally happy with the amp and after a couple of small improvements, changing the speaker is by far the biggest upgrade available to you. Early Hot Rods came with a very cheap speaker that left a lot of people unsatisfied. A well-broken-in stock speaker is not terrible, but it is a long way from delivering anything you would call a recognisable tone.
So which one? It depends entirely on the sound you are after, but I can at least steer you.
Start from the stock amp's actual faults: it is very midrange-heavy and lacks openness in the high presence region. That should drive the choice, rather than picking a speaker because it has a good reputation in the abstract.
- Vintage 30s and Alnico-style speakers emphasise the high mids. On an amp that is already mid-forward, that can compound the problem rather than solve it.
- Creamback-family speakers are more open in that range and shift the midrange focus somewhere else, which is a better complement here.
If you want a safe bet, some version of the Celestion Creamback. It is versatile and it pairs well with this amp, especially if it is otherwise unmodded. On newer Hot Rod Deluxes Fender switched to a version of the Celestion Cream, which noticeably improved things — they arrived at the same conclusion.
You could also explore Eminence, Jensen, or others. I do not have deep personal experience with those, though there are some interesting brands making Fender-style speakers if that is the direction you want.
Worth remembering that swapping a speaker is not only a frequency-response change — the cabinet and driver also change what the amplifier sees, which is a subject in itself and covered in why reactive loads sound different from real cabinets.
Power amp mods
Now the serious work. Let's look at the schematic:

Post phase inverter master volume (PPIMV). Replace the Presence potentiometer with a dual-gang 220 kΩ log pot and wire it as a PPIMV. For the implementation, the Lar-Mar and Trainwreck Type-2 and Type-3 master volume writeups on RobRobinette's site are the standard references and I see no reason to redraw them here.
Adding a PPIMV to this amp is highly worthwhile. It sounds excellent in this circuit, and it solves the real practical problem that the clean channel is excessively loud and hard to control at low volume. It also expands the tonal palette, because a PPIMV changes how the power amp responds when turned down rather than just making it quieter. And the best part: fully open, it is effectively out of the circuit.
Negative feedback resistor. Replace the feedback network with standard Fender values:
- R69: 820 Ω
- R68: 47 Ω or 100 Ω
- 47 Ω keeps the amp cleaner and snappier
- 100 Ω makes it looser and punchier
Those two values are the blackface Deluxe Reverb's feedback arrangement, and the reason they transplant cleanly is that both circuits inject feedback at the same point — the phase inverter's cathode tail. More feedback means lower output impedance and tighter damping; less means the speaker's impedance curve gets more say. Which of 47 and 100 you want is genuinely a matter of feel, and it is a five-minute swap, so try both.
Between them, these two changes create a much more blackface-style power section and a considerably more traditional Fender feel.
Preamp mods
To complement the power amp, the preamp needs work. Note again: most of this is gain reduction.
Input stage cathode capacitors. Replace a few with lower values — around 4.7 µF. A smaller cathode bypass cap does not just reduce gain, it reduces gain selectively, leaving the bass less amplified than the mids and treble. That is why this helps the drive channels so much: it stops the low end being multiplied at every stage on its way through.
V1B local negative feedback network. Add a Dumble-style local feedback network around V1B. This lowers the gain while imparting that signature feel. It is an elegant way to reduce gain without giving up control of which frequencies you are amplifying — local feedback also linearises the stage and lowers its output impedance, which changes how it drives what follows.
Tone stack (optional). Not mandatory, but I prefer it: swap the Middle pot from 25 kΩ to 100 kΩ log. Also inspired by Dumble-style tones, and it gives you a great deal more mids on tap. Worth seeing before you buy the pot — see Try It Yourself below.
Remove C3. Perfectly fine to do once the gain has already been reduced. The result is a more natural, open sound.
V2B input and cathode. Modify both, to further lower the gain and adjust the frequency compensation at that stage.
Remove C11. This one lets the drive channels breathe and improves their character considerably.
Do not panic about all the gain reduction. There is still plenty available. It just sounds and feels much better on the way out.
Reverb mods
Three small changes, and the last one is the one people notice immediately.
C13 (optional). Replacing it slightly reduces the low end going into the reverb, which cleans it up.
C15. Add 100 pF in parallel, or replace it with a larger value, to darken the reverb. I prefer darker reverb tones, particularly with solid-state reverb drivers, which tend to sound brittle otherwise. Experiment up to 1 nF and find what you like.
The reverb pot bleed network — remove it. This one is crucial. It fixes the abrupt, all-or-nothing transition in the reverb mix that these amps have, and turns the reverb control into something you can actually set to a useful amount.
What I Deliberately Leave Alone
The output transformer, the power transformer and the tube complement all stay. There is a temptation with these amps to start replacing iron, and it is nearly always the wrong call at this price point — you will spend more than the amp is worth to chase a difference smaller than the speaker change.
The three-channel switching architecture stays too, relays and all. It is not elegant, but it works when the board is not cooked, and rebuilding it is a different project entirely.
How It Turned Out
That is the full recipe for turning this amp from "good" to "great."
The clean channel gains headroom and manners, and the PPIMV makes it usable at volumes you can actually rehearse at. The drive channels stop honking and start behaving like overdriven amplifier stages rather than a fuzz having a bad day. The reverb becomes a control you set rather than a switch. And the amp stops eating its own board.
I'd originally written that these mods also apply to the Blues Deluxe. Having since pulled the real Blues Deluxe/DeVille schematic to write a dedicated article on that amp, I don't think that's true — it's a different circuit with its own factory bias trim and its own tone-stack values, not a Hot Rod Deluxe with a different badge. Read that article for what actually applies there.
For more on this, my YouTube video on the topic has unprocessed sound samples so you can judge the tonal changes honestly. It is one of my earlier efforts, from when I was still working out how to make videos.
Try It Yourself
Before ordering that 100 kΩ Middle pot, go and look at what it does. Tone Stack Lab will show you the Fender stack with a 25 kΩ mid pot and then with a 100 kΩ one, and the difference in what the Middle control can reach is obvious on the plot in a way it never is from a parts list. Same for the cathode bypass capacitor values — a smaller cap is a high-pass, and seeing where its corner lands tells you immediately why it fixes the low-end mud.
For the power amp end, Feedback Lab covers what changing R68 between 47 Ω and 100 Ω actually does: the amount of feedback, the damping factor, and how much of the speaker's impedance curve ends up in your frequency response.
Sources
- Component designators (R78, R79, R97, R68, R69, C3, C11, C13, C15) refer to the Fender Hot Rod Deluxe service schematic. Designators vary between revisions — verify against your own amp's schematic before desoldering anything.
- The 820 Ω / 100 Ω feedback values are the blackface Fender AB763 arrangement, which transplants here because both circuits inject feedback into the phase inverter cathode tail.
- PPIMV implementation follows the Lar-Mar and Trainwreck Type-2/Type-3 master volume designs as documented on RobRobinette.com.
- The annotated schematic is attached to this article as a PDF.
- The Dumble-flavoured direction was a specific client brief. It is one valid target among several, not the objectively correct one.